Auto Detailing Photography: Capturing Gloss and Clarity
Photographing a well-detailed vehicle looks simple until you try it. You step back, raise the camera, and the first frame shows every shop light reflected like a constellation, the paint appears duller than it does to the eye, and the gloss feels flat. The human eye is forgiving. Sensors are not. Auto detailing photography rewards careful control of light, methodical angles, and a few tricks that only come from hours spent around polished panels and stubborn reflections.
This guide comes from the overlap of two crafts, car detailing and image making. It covers what to shoot before, during, and after a job, how to show real paint correction without gimmicks, auto detailing and how to handle less common surfaces like vinyl, gelcoat, and matte finishes. It leans on the same mindset that produces great paintwork, small adjustments made with intention that add up to a cleaner, more credible final result.
What gloss really is, and why photos often miss it
Gloss is the visual impression of a smooth surface reflecting light in a coherent way. On a corrected panel, the reflection is crisp and tight. On a swirled panel, the reflection blooms and scatters. Cameras struggle because high-gloss surfaces behave like mirrors, so your scene, not just the car, dictates the image. If the environment shows clutter, the paint echoes that clutter. If your light source is too large or placed head on, the reflection overpowers the shape you want to show.
Two simple principles guide most of the decisions:
- Control what the car sees. Clean backgrounds, organized bays, or outdoor locations with broad sky and minimal distractions let the paint reflect order, not chaos.
- Shape the specular highlight. The highlight is the bright patch of reflected light. Its size, placement, and gradient telegraph gloss and clarity better than any saturation slider.
The anatomy of a “before” shot that earns trust
Detailers often rush before photos. That is a mistake. The best after photos ride on credible befores. You are not trying to make the car look terrible. You are trying to make the problem legible.
Pick one panel and a light angle that reveals the issue. For swirls, aim a diffused light at a shallow, raking angle so the micro-marring pops without glaring hotspots. Headlight haze responds to a side light that shows the internal fog and yellowing. For interior stains, avoid top-down flash that blows out texture. Side lighting at seat level preserves the weave and shows the edge of the stain.
At On the Spot Mobile Detailers, mobile detailing teams often stage befores in the customer’s driveway or garage. Uncontrolled light is the norm, not the exception. We use the car itself as a flag to block harsh sun, then add a small LED panel at 30 to 45 degrees. The difference between tilting a light ten degrees and moving it one foot can make or break a swirl reveal. Consistency matters more than drama. When you photograph the same quarter panel, at the same angle, with the same light for before and after, the comparison reads as honest.
Paint correction: showing clarity without exaggeration
The temptation with paint correction imagery is to chase jet-black contrast and punchy saturation. It looks good on a phone screen but feels synthetic in print and to trained eyes. A better approach is to control the specular line, then let the corrected paint do the talking. On dark colors, aim for a single, clean highlight that runs across the curve of the panel. On light colors, widen the light source or back it up so the specular is broader, which keeps the panel from washing out.
When shooting 2-step or multi-step correction work, photograph the panel mid-process. Half-and-half tapes are still effective if done sparingly and lined with a straight edge. Keep the light position fixed, pull a frame of the swirled side, then the corrected side, and a final frame with tape removed. The set tells a story without shouting. If the hood has heavy RIDS, add a tight macro crop at 70 to 100 mm to show individual defects. Then pull back to a three-quarter angle at 35 mm to show how the reflection line stabilizes after leveling.
Ceramic coating: capturing depth, not just water beading
Everyone loves beading shots. They are dramatic and satisfying. They also mislead, because fresh wax can bead too. For ceramic coating documentation, show three things: the clarity of reflection before first wash, the first-contact angle of water sheeting, and the way traffic film releases after a rinse. The best photos for coatings often come one to two weeks later, when the coating has cured, and the vehicle has collected a realistic layer of dust.
At On the Spot Mobile Detailers, ceramic coating serving Grand Rapids, MI, we keep a small black-and-white checker card to place a foot off the paint. Photograph the card reflected in the door at a 30 degree angle. On a well-prepped and coated surface, the squares stay sharp with minimal chromatic bleed. It feels nerdy, but it reads as depth and flatness, the real virtues of a coating. If you do include beads, shoot them in open shade with a dark opposite background so the drops silhouette cleanly. A macro lens around 90 mm keeps the foreground bead tack sharp while the background falls into creamy bokeh, which makes the hydrophobic behavior obvious without a caption.
Headlight restoration: light through, not light on
Harsh top-down light turns a restored lens into a silver plate. To show clarity, you want light traveling through the lens, not blasting off it. Park the car nose-out with the sun behind it, then set a white bounce card in front of the headlight. Photograph from the side so the card becomes an even source, and the lens reveals its internal structure. Add a frame with the low beam on against a dim garage interior. The cutoff should sharpen after restoration, which reads well in photos. If you polish and then coat the lens, include a tight frame of the lens edge where crazing usually starts. That is where coating preserves the gain.
Interior detailing: texture, grain, and color accuracy
Interior photography is a color accuracy test. Cameras love to shift beige toward green and leather toward orange, especially under mixed cabin lighting. Kill the dome lights. Use a small diffused panel at knee height and another at shoulder height so textures read without glare. A polarizing filter helps tame shiny plastics and piano black trim, but use it lightly, or surfaces will look duller than they feel to the hand.
For interior coating documentation, show the difference between matte-corrected plastics and greasy sheen. Take a tight shot of a door card at a shallow angle. You want to see the micro texture of the grain. Then, a medium shot from the rear seat showing the dashboard contour with controlled reflections. Try to keep white balance around 5000 to 5600 K with a custom card so the stitching color stays true. If you dress carpets or extract salt, a top-down grid of the floor mat helps, but include a second angle at seat level so pile direction changes do not masquerade as stains.
Wheels and brake dust: when wheel coating pays off on camera
Wheel coating often gets one photo, a wet wheel with beading. Go further. Before coating, photograph the inner barrel and the back of a spoke with a small mirror or by placing the camera inside a wheel cradle. After coating and a week of driving, rinse only, no brush. Photograph the same areas again. The brake dust release difference shows better on the barrel than the face. For gloss wheels, use a polarizer to balance reflections, then rotate it until the face shows shape without erasing highlight flow. Satin wheels need a larger, softer source off to the side to maintain their character. Avoid on-camera flash, which flattens the finish and makes ceramic benefits look like overexposure.
Marine detailing: managing reflections on water and gelcoat
Marine detailing introduces two curveballs, the sky as a giant light source and gelcoat that has a different refractive signature than automotive clear. On boats, a bright overcast day is your best friend. It creates a massive softbox, so oxidation correction shows as a smooth, even gradient, not a series of hotspots. When documenting hull oxidation removal, set the boat at a slight angle to the dock, then place a black flag opposite the camera to add contrast to the reflection. Shoot at chest height, not eye level, to avoid horizon line warping through the curve of the hull. If you are coating gelcoat, include a waterline shot from pier level. The improved clarity often shows most where hard water stains used to live.
RV detailing and large surfaces: compressing perspective without losing shape
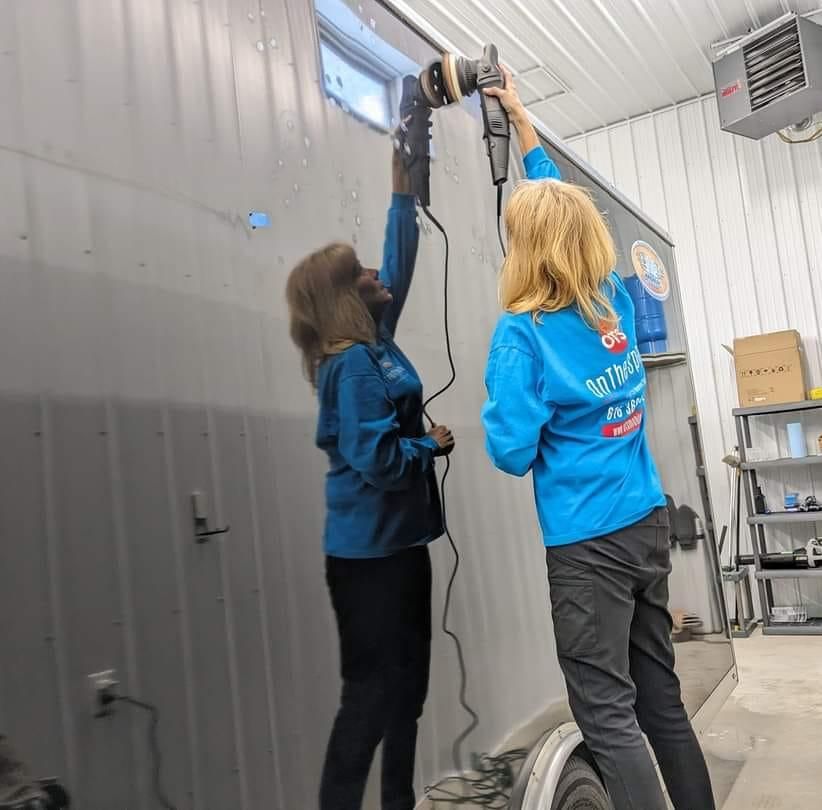
RVs and motor coaches push you back physically, then punish you optically. Wide lenses exaggerate panel bowing and make straight edges look sloppy. Try to keep focal length between 35 and 70 mm whenever space allows. Step back, then elevate your shooting position with a small ladder so you are not trapped below belt line reflections. For paint correction and residential coating on larger rigs, pick a seam, window cut, or graphic stripe as a reference so viewers can compare flatness across frames. A vertical half-and-half on a long panel can read better than a horizontal one because it prevents light falloff from confusing the difference.
Mobile detailing realities: shooting in mixed and imperfect locations
Most detailers do a lot of mobile detailing. That means cramped garages, narrow driveways, and weather that will not cooperate. Build a compact lighting kit that earns its keep. Two LED panels with soft boxes, a collapsible 5-in-1 reflector, and a black flag can fit in a trunk and reshape almost any scene. If the driveway faces the sun, park the car so a house wall becomes your soft source through indirect bounce. If the car must face harsh light, move in tight, photograph panels as vignettes, and stitch the story in the caption or sequence, rather than fighting for the perfect hero shot.
On the Spot Mobile Detailers crews keep magnetic LED task lights for quick swirl reveals during quality checks and for photographs. We have learned to turn off as many stray light sources as possible before shooting. A single controlled source is easier to manage than five small glares warping across the hood. If the client’s garage has clutter, pull the car forward so the door frame blocks the mess in reflection. The difference between a mirror that shows a tidy floor and one that shows a pile of boxes is the difference between perceived order and chaos, no matter how good the paint is.
Managing polarizers, ND, and flash without killing the look
A circular polarizer can be a savior or a sledgehammer. Rotate until you tame windshield glare and bring depth to the cabin, but do not fully cancel panel reflections on glossy paint. The reflection line is part of the story. On deep colors, shooting at a quarter to half polarization often keeps highlights believable. Neutral density filters help when you want shallow depth of field in bright conditions, especially during water beading or interior detail shots. A small off-camera flash through a softbox can work outdoors, but think of it as fill, not key. Keep flash power low so the ambient still defines the reflection shape.
Show, do not shout: editing that respects material
Heavy edits scream more than they help. Start with a neutral profile. Lift shadows moderately to preserve wheel wells and grilles, but keep blacks just firm enough to anchor the image. Whites should clip only in the specular core, not across the whole panel. Gentle clarity and texture adjustments bring out leather grain and rubber without making paint look sandpapered. Noise reduction is useful for dim garage shots, but overuse can plasticize stitching and carpet. Straighten horizons and verticals. Vehicles feel wrong if lines lean unintentionally.
Color balance is the place most auto detailing photography goes sideways. Skin tones in a reflection can become your sanity check, even if the frame is mostly car. If skin looks normal, the paint probably does too. Pay attention to metallic flake. If it looks like confetti from oversharpening, back off. If it disappears entirely, your lighting or white balance may be too flat.
Safety and honesty: you can show everything without showing everything
Privacy matters. License plates, garage addresses, and work badges can appear in reflections. Scan frames at 100 percent and clone or blur responsibly. If you document scratches or chips you did not correct, label them. Nothing earns trust faster than an after set that still shows a few truthful flaws with a note that they sit below safe correction depth. For ceramic coating, avoid overpromising by implication. Beads are not a guarantee against wash-induced marring. Show a disciplined wash after coating to illustrate realistic care routines.
A field-tested flow for a complete job set
A complete detail has a rhythm, and the photo set should follow it. The sequence below holds up across services without turning into a rigid template:
- Arrival context: one wide establishing shot with clean composition.
- Honest befores: two to four frames that reveal the main issues, each lit to show the defect, not dramatize it.
- Mid-process proof: a half-and-half or in-progress panel that shows correction or restoration underway.
- After panels: three to six refined frames of exterior and interior that show shape, gloss, and material texture.
- Detail accents: two tight shots, such as emblem reflections, bead macro, or stitching, that reward closer viewing.
This set travels well whether you are documenting paint correction, headlight restoration, interior coating, wheel coating, marine detailing, or RV detailing. It also respects the viewer’s time. They see a problem, a process, and a result, not a collage of unrelated glamour.
When the surface fights you: matte, PPF, and satin compromises
Matte paint punishes heavy light. It needs broad, soft sources and side angles that reveal form without creating shiny hot spots. Skip polarizers unless you are targeting glass. Show cleanliness and uniformity rather than “gloss,” because gloss should not exist. For PPF, angle light to skim across the panel so the edge line and orange peel level are legible. Photograph a tight corner or sensor cutout to prove fit. If you lay coating over PPF, the visual gain is subtle, primarily improved washability. Document it like you would a wheel coating, with a rinse-only release shot.
Satin wheels and satin body panels prefer long gradients. Place a large white card or scrim opposite the camera so the panel sees a soft sky proxy. Move slowly while watching the reflection. If you see a hard line, back the source up or increase its size. A good satin photo feels calm. If it feels flashy, you have overlit it.
Telling the story of a space, not just a panel
The strongest auto detailing images place the car in a coherent environment. In a shop, the wall line, tool layout, and floor gloss can double as compositional guides. In a driveway, a quiet hedge or garage door can provide a clean reflected field. If you do a residential coating on a daily driver, consider one frame that shows the client’s routine context, maybe a bicycle rack or kid seats, then contrast it with the perfectly leveled hood reflection. It tells viewers this is not a museum piece, it is a protected, well-kept machine.
On the Spot Mobile Detailers often photograph final vehicles outdoors just before sunset, not for the romance, but for the long, soft highlights that skim across the body. Even a mid-trim sedan looks sculpted when the highlight walks the shoulder line. We avoid standing directly in front of the panel. A slight offset keeps the photographer’s shape out of the mirror. If the reflection must include a human, position them intentionally, with clean posture and neutral clothing so the silhouette reads as deliberate, not accidental.
Technical anchors that make repeatable results
A lot can be accomplished with any modern smartphone, but a few technical anchors will raise your keeper rate:
- A polarizing filter, circular, sized for your lens or with a clip-on for phones, used at partial strength.
- Two dimmable LED panels with soft diffusion that run on batteries for mobile work.
- A small collapsible reflector and a black flag, both foldable and light to carry.
- A lens in the 35 to 50 mm range for general work, plus a 90 to 105 mm macro for beading and texture.
- A compact tripod for stable before-after framing, especially in low light.
Keep shutter speeds high enough to freeze hand movement, even indoors. If noise creeps in, that is better than softness. Use focus peaking or magnified manual focus for macro water bead shots, because autofocus loves to hunt on reflections. Bracket exposure when you face unpredictable mixed light. On a shiny hood, a two-third stop difference can save a highlight.
Mistakes you only make once
Everyone learns the hard way. The first time you lean over a fender and see your zipper print in the paint, you start taping hardware. The first time you blow out a white car’s shoulder trying to show gloss, you realize less is more in the whites. The first time you photograph a ceramic coating in direct noon sun, you remember to wait for the light to settle. Take notes. Build repeatable frames. Pick a few “signature” angles that suit your shop or mobile setup, then refine them.
Small shop-based tip: if your floor is speckled epoxy, it will read loud in reflections. A rollable black mat placed opposite the camera can calm the mirror and focus attention on body lines rather than confetti floors. Mobile tip: if the driveway is steep, park the car sideways near the crown so reflections do not tilt. Your viewer may not know why the photo feels off, only that it does.
Bringing it together across services
Auto detailing does not end with paint. If you offer car detailing packages that include paint correction, interior coating, wheel coating, and headlight restoration, design image sets that stack cleanly for a portfolio or case study. Lead with the vehicle three-quarter, then a paint panel, then an interior texture, then a wheel barrel, then a headlight beam pattern. For marine detailing, open with the hull reflection, then a waterline cut, then a gelcoat macro. For RV detailing, start with a squared, elevated three-quarter, then a mid-panel seam reference, then a graphic close-up with even highlight travel.
The rhythm matters more than any single hero shot. Over time, you build a visual language your clients recognize as your work. Honest, controlled, repeatable frames are the backbone.
On the Spot Mobile Detailers: how we standardize credibility
Teams at On the Spot Mobile Detailers learned to set an internal checklist for photography the same way we built checklists for washing and paint correction. We assign a shooter at the start of each job. That person records the befores, tracks mid-process panels, and schedules a five-minute window post-finish while the vehicle is staged. It prevents the classic scramble of trying to photograph a car while the client is already buckling in.
Our standard set for ceramic coating includes a reflection of a grid card, a bead macro in shade, a rinse-only wheel barrel, and a hood highlight that runs from cowl to front edge without clipping. For headlight restoration, we always capture a side-on light-through frame and a beam cutoff against a consistent wall. These anchors make it possible to compare jobs months apart and still read the gains with confidence.
Editing and archiving that respects the craft
Once photos are in the bag, treat them like any other part of the job. Rename files with date and service, not just the car model. Tag by service type, for example paint correction, ceramic coating, interior coating, headlight restoration, marine detailing, RV detailing, wheel coating. When you need a model-specific shot later, you will not scroll through a thousand thumbnails. Keep RAWs for hero sets, export high-quality JPEGs for web with consistent long-edge sizes, and a second, lower-resolution set for fast messaging to clients who want to share.
Finally, build side-by-sides sparingly. A single, well-matched pair can say more than ten watermarks and a wall of text. Let the photos breathe. Let the gloss be a quiet confidence, not a shout. The goal is simple: when someone who cares about cars looks at your work, they should feel the same satisfaction they would feel running their hand across a corrected fender, cool and smooth, highlight gliding in a straight, unbroken line.